
★ .22LR Knowledge Base
Headspacing a .22 LR for Lapua, SK, Eley, and RWS
A precision shooter's guide
By Joe Eldridge
© Property of Texas Long Gong
You are welcome to share a link to this article or link back to it from your own site. Please do not copy, republish, or rehost the article in whole or in part on another site. Backlinks are encouraged; lift-and-shift is not permitted.
If you've ever wondered why two rifles chambered for the same cartridge can shoot the same lot of ammunition so differently, headspace is one of the first places to look. For the rimfire shooter trying to squeeze every last fraction of an MOA out of a Lapua, SK, Eley, or RWS match round, dialing in headspace is one of the highest-leverage tuning steps available. It costs less than a brick of ammo and can transform a rifle that "shoots OK" into one that consistently rewards good fundamentals.
This article walks through what headspace means in a .22 LR context, why premium match ammo is so sensitive to it, what the optimal target is, and how to get there using precision shims — including the shim kits available from triggershims.com.
What Headspace Actually Is in a Rimfire
In centerfire bottleneck cartridges, headspace is measured to the shoulder. In rimmed cartridges like the .22 LR, headspace is the distance from the bolt face to the rear face of the barrel — the surface the rim of the cartridge bottoms against when chambered. That distance, less the thickness of the rim, is the gap the firing pin has to traverse before it begins crushing the rim against the chamber edge to ignite the priming compound.
A few implications fall out of that geometry:
- The rim is the headspace surface. Variation in rim thickness directly affects how far the cartridge sits from the bolt face, which affects firing pin energy delivery.
- Too much headspace means the firing pin travels further before it strikes a supported rim. The result is reduced effective pin energy, inconsistent priming compound ignition, and — in worst cases — light strikes or hangfires.
- Too little headspace means the bolt won't close cleanly on thicker rims, or it crushes the rim before the firing pin even falls. You'll see hard bolt closure, occasional pierced rims, and inconsistent ignition timing.
The sweet spot is a headspace dimension that produces consistent rim crush across the rim-thickness population of your chosen ammo lot. Consistency, not minimum, is the goal.
SAAMI Spec and What It Means in Practice
The published SAAMI specifications for .22 LR are:
| Gauge | Dimension |
|---|---|
| Go | 0.0430" |
| No-Go | 0.0465" |
| Field Reject | ~0.0470"+ |
A factory rifle is typically built somewhere between Go and No-Go, often in the 0.043"–0.046" range. For a hunting or plinking rifle, anywhere in that range is fine. For precision rimfire — and especially for the kind of work we ask of a Long Gong rifle at 300 yards — that window is far too coarse. We want to be within ±.0005" of a deliberately chosen target.
Match Ammunition Rim Thickness: What You're Working With
Lapua, SK (a Nammo product, sister to Lapua), Eley, and RWS (RUAG Ammotec, Germany) all hold tight rim-thickness tolerances by industry standards, but each maker — and each lot within a maker — sits in a slightly different band.
Approximate rim-thickness ranges I've measured and seen reported consistently across competitive shooting communities:
| Manufacturer | Typical Rim Thickness | Lot Average |
|---|---|---|
| Lapua (Center-X, Midas+, X-ACT, Polar Biathlon) | 0.039"–0.043" | ~0.041" |
| SK (Long Range Match, Rifle Match, Pistol Match) | 0.039"–0.043" | ~0.040"–0.041" |
| Eley (Tenex, Match, Team) | 0.038"–0.042" | ~0.040" |
| RWS (R50, R100, Rifle Match, Target Rifle) | 0.039"–0.043" | ~0.040"–0.041" |
These are populations, not single values. A single 50-round box of Center-X will typically span .002"–.003" of rim thickness. A premium tier like X-ACT, Tenex, or R50 will be tighter, but still not zero. This is why rim-thickness sorting (separating ammo into bins of equal rim thickness using a tool like the Sinclair or Bald Eagle rim gauge) is a common precision practice, and it interacts directly with the headspace decision discussed below.
What Optimal Headspace Looks Like
The principle most competitive rimfire shooters converge on:
Set headspace approximately .001"–.002" greater than the average rim thickness of your chosen ammo lot.
That gives you:
- Enough clearance that the bolt closes consistently on the thickest rims in your lot
- A small enough gap that the firing pin delivers consistent crush across the rim-thickness population
- Margin to swap lots within a maker without re-shimming, as long as average rim thickness stays in band
For the four ammo families this article addresses, that produces a practical target window of roughly 0.042"–0.043" for most Lapua, SK, and RWS lots, and 0.041"–0.042" for tight Eley lots. Many top benchrest shooters run as tight as 0.040"–0.041" with carefully rim-sorted ammo, but that's a configuration you adopt deliberately — not one you fall into.
A reasonable default for someone tuning a precision .22 around match ammo without committing to per-lot resorting:
| Primary Ammo | Target Headspace |
|---|---|
| Lapua Center-X / Midas+ | 0.042" |
| SK Long Range Match / Rifle Match | 0.042" |
| Eley Tenex / Match | 0.041" |
| RWS R50 / R100 / Rifle Match | 0.042" |
| Mixed (you switch between brands) | 0.042" |
These numbers assume an action with .039"–.040" firing pin protrusion and a healthy spring. If you've tuned firing pin protrusion separately (some Vudoo, RimX, and aftermarket CZ pin setups), revisit your headspace target after — the two are coupled.
Measuring Your Current Headspace
Before you change anything, measure where you are. There are three practical methods:
1. Go / No-Go Gauges. A Forster, Manson, PTG, or Whidden Gun Works go/no-go gauge set is the gold standard. Drop the gauge in, close the bolt by feel only (never force). If the bolt closes on Go and not on No-Go, you're inside SAAMI spec. Add a precision feeler gauge or a 0.001" step gauge stack to refine within that range.
2. Step Gauges. A purpose-built rimfire step gauge (Stiller, PTG, and others sell them) has rim-mimicking discs in 0.0005" or 0.001" increments. You find the thickest disc the bolt will close cleanly on — that's your headspace measurement to ±0.0005".
3. Sorted Ammo as a Reference. If you've rim-sorted a known lot of ammo and have ten rounds at exactly, say, 0.041", you can use them as field reference. The bolt should close cleanly with light primary extraction effort. This is a rough method but informative as a sanity check.
Don't trust a single measurement. Take three, rotate the gauge, and average.
Adjusting Headspace with Shims from triggershims.com
triggershims.com produces precision stainless steel shims in graduated thicknesses — typically 0.0005", 0.001", 0.002", 0.003", and 0.005" — sized for the most common precision rimfire platforms. They started out making sear and trigger shims (still their bread and butter for CZ 457 trigger refinement), but their barrel shim kits have become a standard tool for rimfire headspace work.
The basic principle is the same across platforms, even if the geometry differs:
- Inserting a shim between the barrel shoulder and the action face moves the chamber forward, away from the bolt face, which INCREASES headspace.
- Removing a shim (or starting from no shim and machining the barrel shoulder) moves the chamber rearward, which DECREASES headspace.
Each 0.001" of shim moves headspace by 0.001" in a properly seated installation. This linear relationship is why shims work so well for fine-tuning.
CZ 457
The CZ 457 uses a V-block clamp to retain the barrel. The action allows the barrel to be positioned at variable insertion depth, which is the primary mechanism for headspace adjustment. Shim use on the 457 typically falls into two categories:
- Barrel-positioning shims: a thin shim ring placed against the barrel's recoil shoulder before insertion, which gives a repeatable hard stop and prevents the barrel from being pushed too deep when the V-block is torqued.
- Trigger and sear shims: not headspace-related, but a parallel triggershims.com use case that 457 shooters often combine into the same project.
For headspace tuning on a 457, the workflow is:
- Loosen the V-block screws (typically 2x T20 Torx)
- Insert the appropriate shim against the barrel shoulder
- Reseat the barrel to its hard stop
- Verify with go/no-go or step gauge
- Torque the V-block screws to manufacturer spec (typically 45 in-lb, but verify your model)
Vudoo V-22, Bergara B-14R, and other Rem 700 footprint actions
These actions use a threaded barrel that shoulders against the action face, with headspace set by the barrel shoulder location. Shims here go between the barrel shoulder and action face, behind the recoil lug. Each 0.001" of shim pushes the chamber forward by 0.001" and increases headspace by the same amount.
The workflow:
- Remove the action from the stock and the barrel from the action (barrel vise and action wrench required)
- Clean the threads and mating surfaces
- Stack the shim(s) on the barrel shoulder against the recoil lug
- Hand-thread the barrel back in until shoulder contact
- Torque to spec (typically 35–45 ft-lb, action-dependent)
- Verify with go/no-go or step gauge
RimX, Anschutz, and Tikka T1x
The RimX uses a threaded collar system that allows headspace adjustment without shims. Anschutz match actions are typically set at the factory with very tight tolerance and not user-adjustable without gunsmith involvement. The T1x uses a clamp similar in concept to the CZ 457 but with less of a precision shooter aftermarket — shimming is possible but less commonly documented.
Shimming the Bolt: Often Easier and More Repeatable
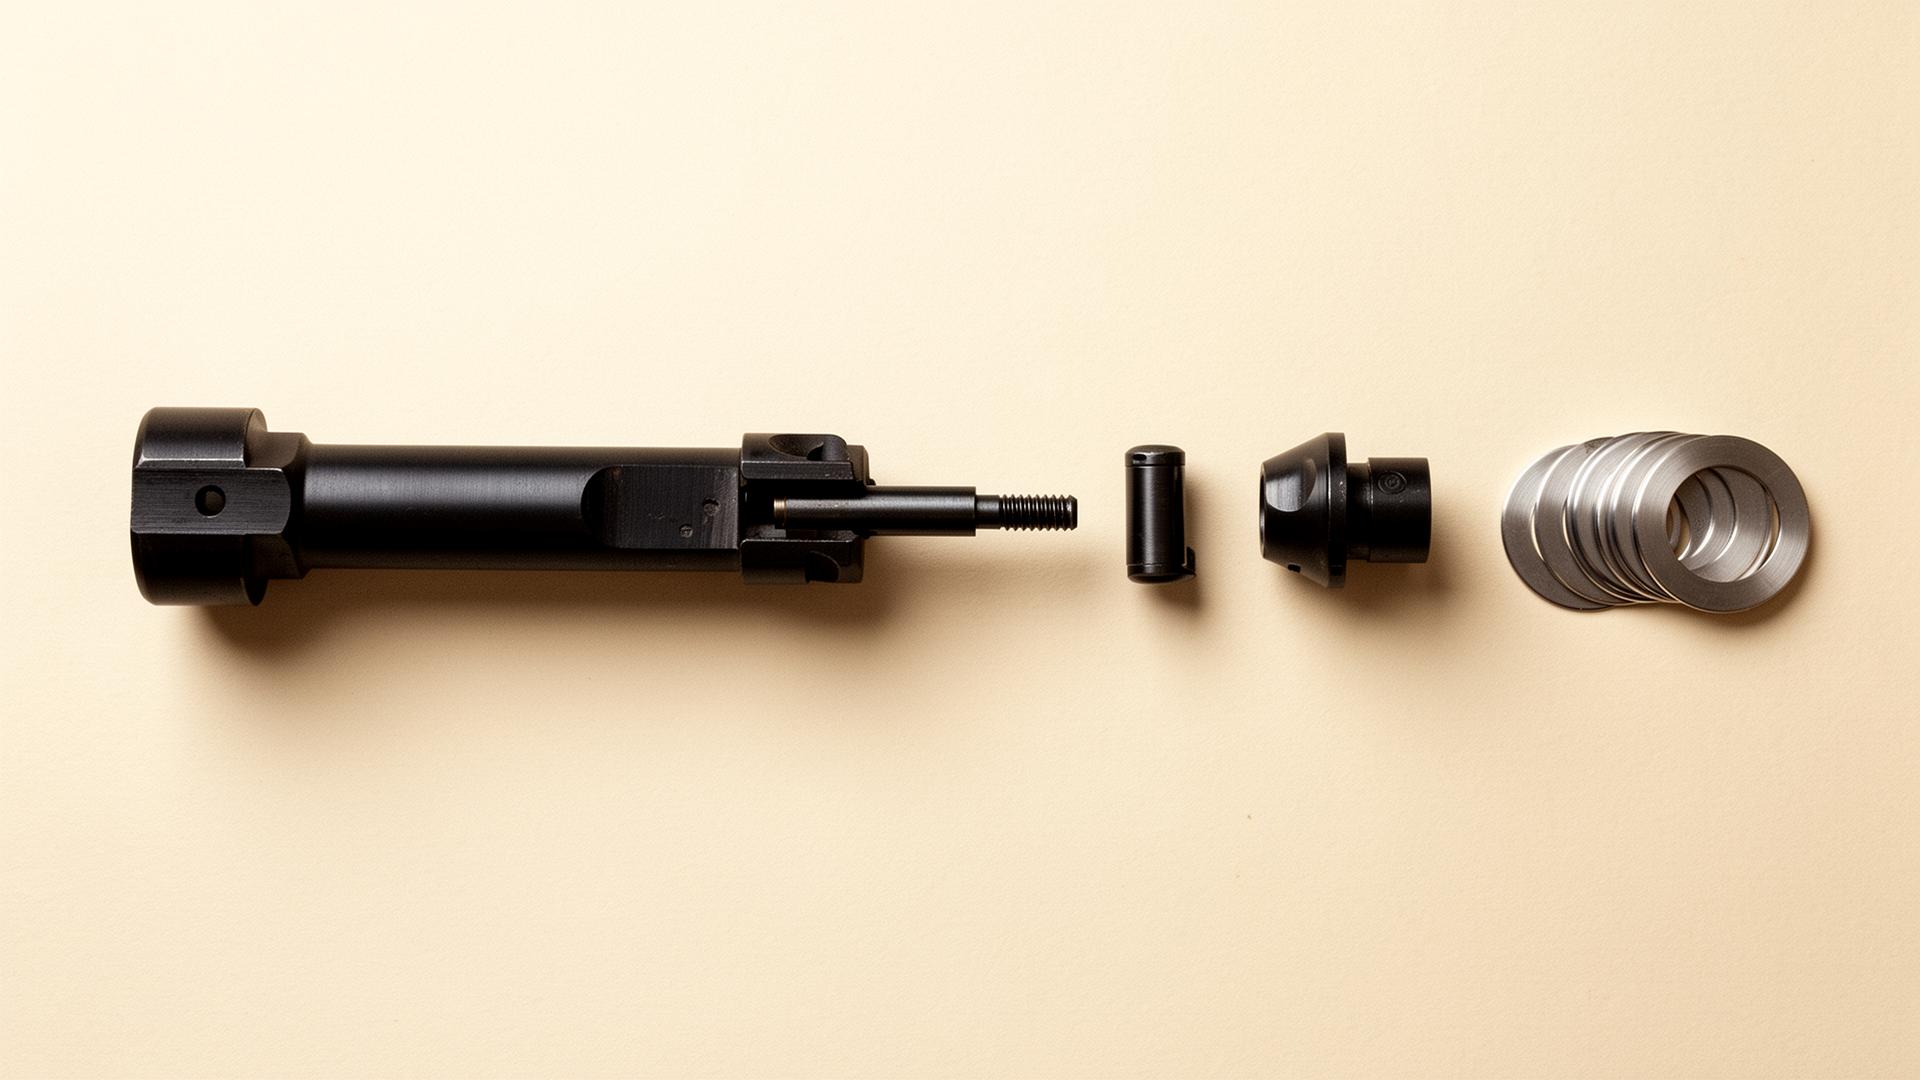
If barrel shimming isn't an option for your action — or if you've tried it and the result isn't as clean as you'd like — shimming the bolt is an excellent alternative that, in many cases, is actually the preferred approach. The principle is symmetric to barrel shimming but works in the opposite direction:
- Adding a shim behind the bolt face extends it forward (toward the chamber), which DECREASES headspace by the shim thickness.
- Removing a shim (or starting from a stock bolt face position) lets the bolt face sit rearward, which INCREASES headspace.
The advantages over barrel shimming are real:
- No barrel removal. You don't need a barrel vise, an action wrench, or to re-torque the barrel to spec.
- No disturbance of the barrel-action interface. Threads, shoulder surfaces, and bedding stay untouched.
- Faster. Bolt disassembly on most modern precision .22 actions is a 5–10 minute job.
- More repeatable. Bolt geometry has clean, well-understood stop points. Shim stack thickness translates almost perfectly to headspace change, without the variability of barrel torque or seating depth.
- No gunsmith involvement required. Anyone with a punch set, a torque wrench, and a clean workspace can do it.
The CZ 457 and Bergara B-14R bolts are particularly well-suited to this work — both designs make the bolt face accessible with simple tooling and have clean, parallel surfaces behind the face for a shim to seat against. For most precision rimfire shooters working within the 0.041"–0.043" target range, bolt shimming is the path of least resistance.
CZ 457 Bolt Shimming
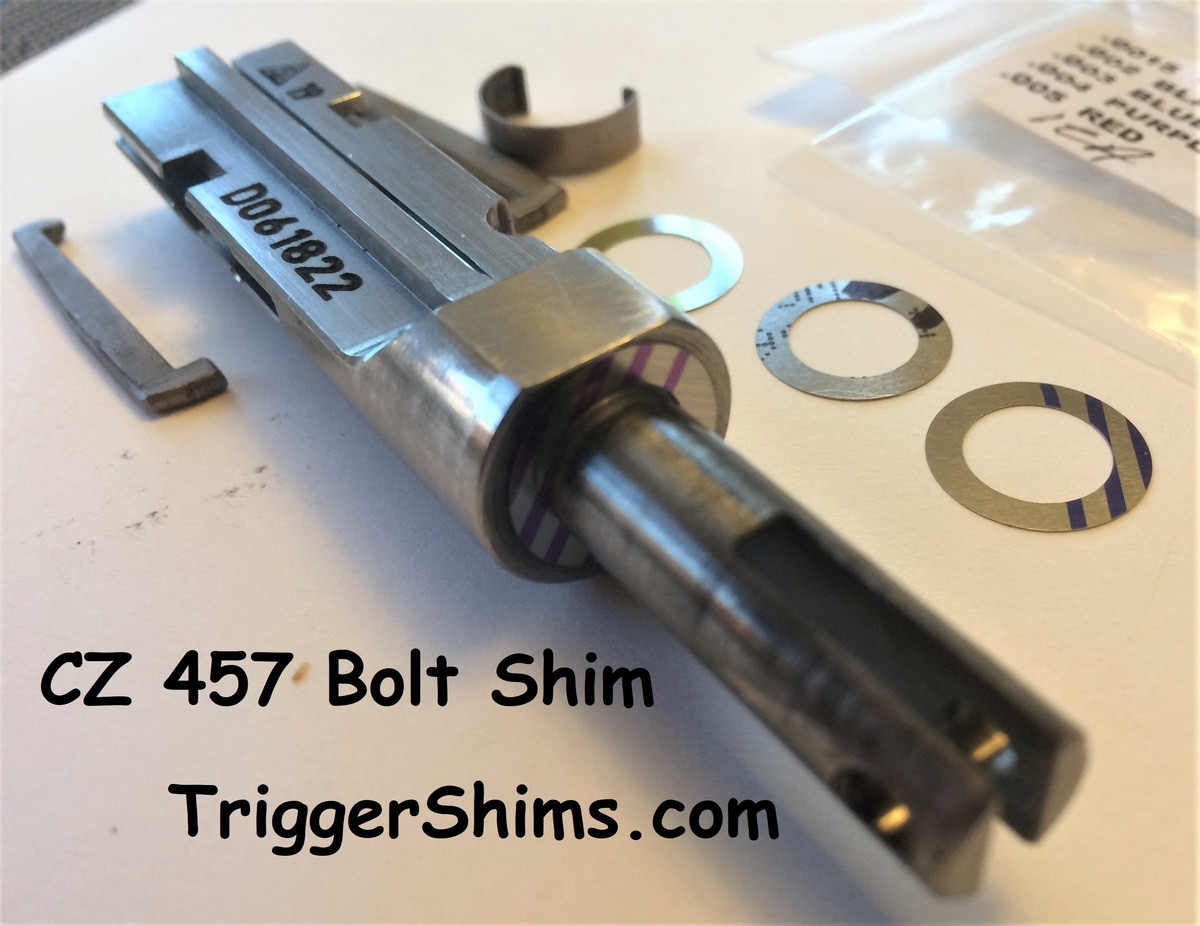
The CZ 457 bolt is one of the most shim-friendly designs in the precision rimfire market. To shim the bolt face:
- Remove the bolt from the action
- Disassemble the bolt: remove the cocking piece (some 457 variants require a small pin punch; others allow tool-free disassembly)
- Withdraw the firing pin assembly
- The bolt face / bolt head will separate from the bolt body
- Place the shim(s) on the bolt body, against the bolt head seating surface
- Reassemble in reverse order
- Verify headspace with go/no-go or step gauge
Each 0.001" of shim moves the bolt face forward by 0.001" and decreases headspace by the same amount. triggershims.com offers shim kits sized specifically for the 457 bolt.
Bergara B-14R Bolt Shimming
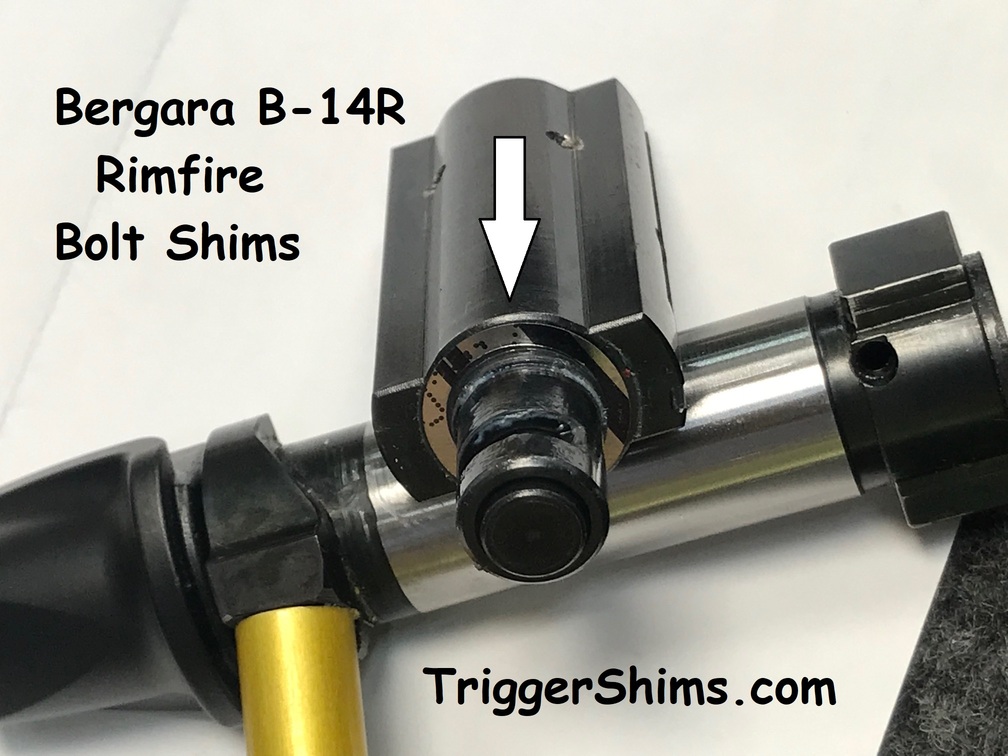
The Bergara B-14R bolt follows the same general approach — Rem 700-pattern bolt body with a removable bolt head that can be shimmed. Disassembly differs slightly from the CZ 457 (a bolt-disassembly tool helps but isn't strictly required), but the principle and outcome are identical: shim behind the bolt face, headspace decreases by the shim stack thickness.
Cautions for Bolt Shimming
Bolt shimming is forgiving, but a few rules apply:
- Don't shim past available firing pin protrusion. Adding shim moves the bolt face forward, but the firing pin tip stays in the same position relative to the bolt body. Net effect: effective firing pin protrusion shortens by the shim stack thickness. Stay under 0.003"–0.005" total shim unless you've verified protrusion separately, or you'll trade headspace consistency for light strikes.
- Watch for rim deformation. Excessive shimming can cause the bolt face to crowd the case rim. If you see rim deformation on fired cases that wasn't there before, back off the stack.
- Re-verify primary extraction. A shimmed bolt should still cycle smoothly. If extraction effort changes noticeably, something else is wrong — check that the shim is properly seated and the bolt head is fully concentric.
A Worked Example
Say you're shooting Lapua Center-X, and you've sorted a brick into rim-thickness bins centered at 0.0410". Your target headspace is 0.042" (about .001" above your sorted average).
You measure your CZ 457's current headspace at 0.0445" using a step gauge. To get to 0.042", you need to decrease headspace by 0.0025". You have two clean paths:
- Barrel-side adjustment: re-seat the barrel about 0.0025" deeper into the V-block (no shim, or remove an existing one if present).
- Bolt-side adjustment (usually the easier and more repeatable path): install a 0.002" + 0.0005" shim stack behind the bolt face. The barrel-action interface stays untouched, and the change is fully reversible without unclamping the barrel.
If you instead measure 0.0395" — too tight, bolt won't close on thicker rims — you need to increase headspace by 0.0025". On the barrel side, add a 0.002" + 0.0005" shim stack at the shoulder. On the bolt side, remove any existing bolt-face shim stack (if present) by 0.0025". Verify after either change.
The verification step matters every time. Shim stack height isn't always perfectly additive (small burrs, surface contamination, or uneven torque can introduce 0.0002"–0.0005" of error), so measure after every change.
Verification and Final Checks
After every headspace change:
- Confirm with a gauge. Don't trust the math; measure.
- Function check with sorted ammo. Cycle 10 rounds of your target lot. Bolt closure should be smooth and consistent across all of them.
- Live fire test. Shoot a 50-round group at your zero distance. You're looking for tight vertical, which signals consistent ignition timing — the practical payoff of correct headspace.
- Re-verify torque. After the first 50 rounds, re-check V-block or barrel torque. Initial seating can settle slightly.
If you swap to a different ammo brand or a markedly different lot, re-measure rim thickness average. If it's within ±0.001" of your previous lot, no change needed. If it's further off, you may want to re-shim or accept a small consistency penalty.
Common Pitfalls
- Chasing zero clearance. Some shooters aim for headspace that exactly matches average rim thickness. This crushes too aggressively, beats up rifles, and produces worse consistency, not better.
- Ignoring rim-thickness sorting. Headspace tuning and rim sorting are complementary. Tightening headspace without controlling rim thickness just exposes you to the bottom of your ammo's rim-thickness distribution.
- Mixing brands without re-measuring. Eley, Lapua, SK, and RWS aren't interchangeable for headspace purposes. Each lot deserves a quick rim measurement before you make changes.
- Skipping verification after a shim swap. Always re-gauge. Always.
- Over-torquing the V-block or barrel. Manufacturers publish torque specs for a reason. Excessive torque distorts the receiver and can produce nonlinear shim behavior.
Bottom Line
Optimal headspace for precision .22 LR work with Lapua, SK, Eley, and RWS match ammo lives in the 0.041"–0.043" range, set deliberately at approximately 0.001"–0.002" above the rim-thickness average of your chosen ammo lot. The geometry is simple. The execution requires a step gauge or go/no-go set (Whidden Gun Works is a reliable source for purpose-built rimfire gauge sets, alongside Forster, Manson, and PTG), a small kit of precision shims (triggershims.com is the most accessible source for graduated stainless shims in the relevant thicknesses), and the discipline to verify after every change.
Once it's set, the difference shows up on paper and on steel. Tighter vertical, more predictable ignition, and a rifle that quietly stops being the variable in your shooting equation.
Community rating
Comments on Headspacing a .22 LR